Every serious production app must have APM installed. This post will guide you through New Relic setup and deployment on Laravel Vapor with the help of GitHub Actions.
1. Preparing New Relic
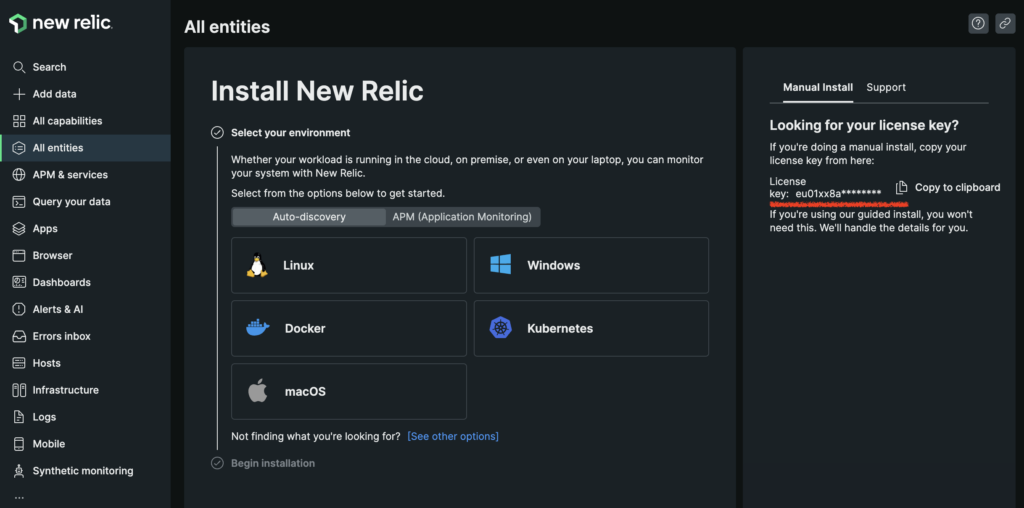
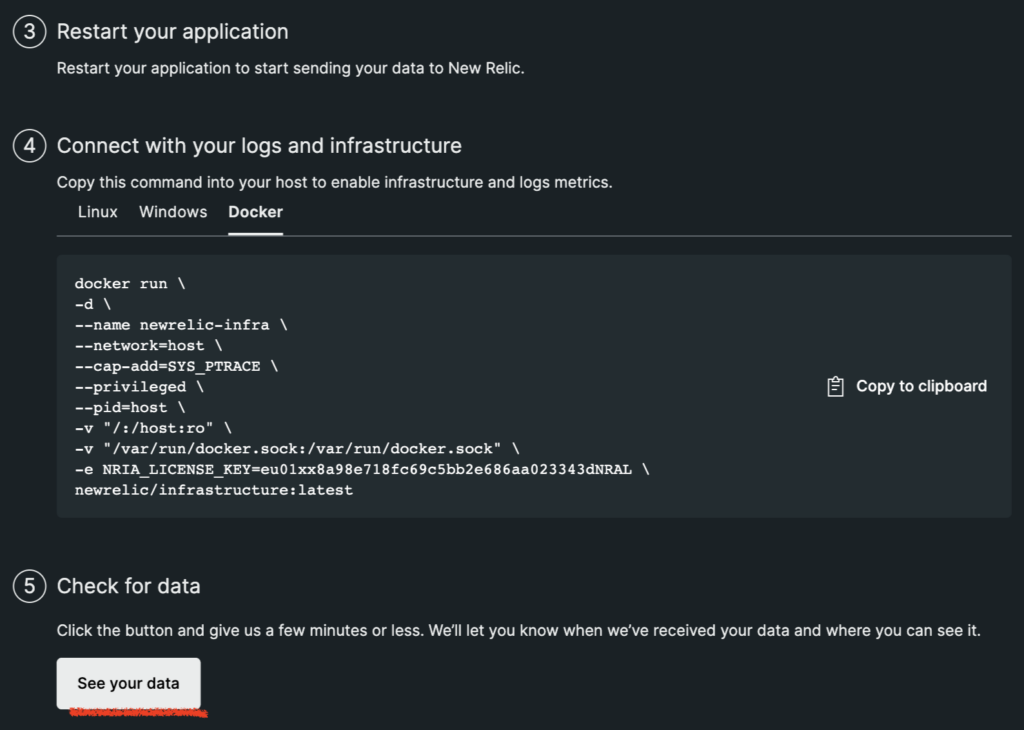
After you create account and log in to New Relic, you should see a welcome screen similar to the one on the following screenshot. Copy and store license key from the right side.
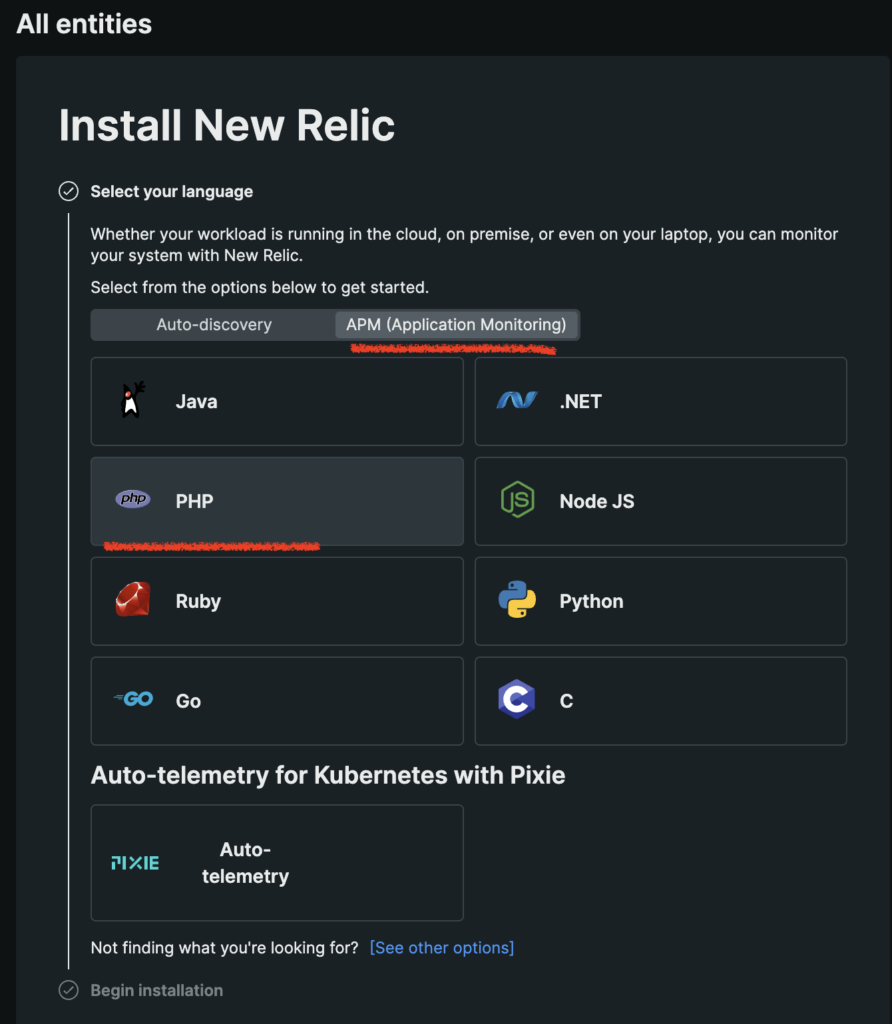
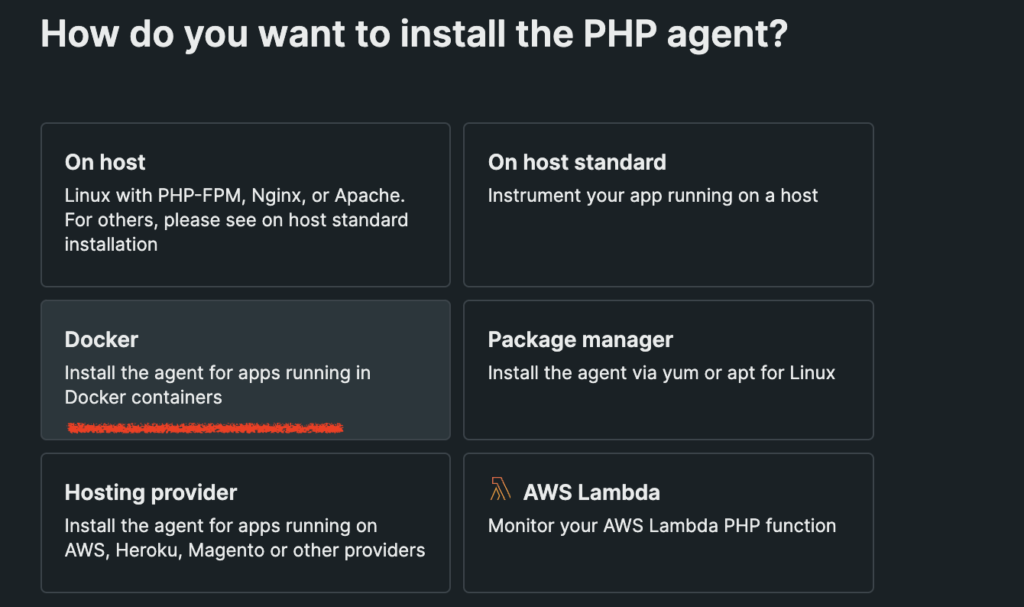
Next, on the same page, select APM (Application Monitoring) and click on PHP. On the next screen, click on “Begin installation” button. Then, select “Docker” and finally, enter application name. We will call our application “xdoo”. Take note of the exact app name you entered in the last step since we will need it in configuration.
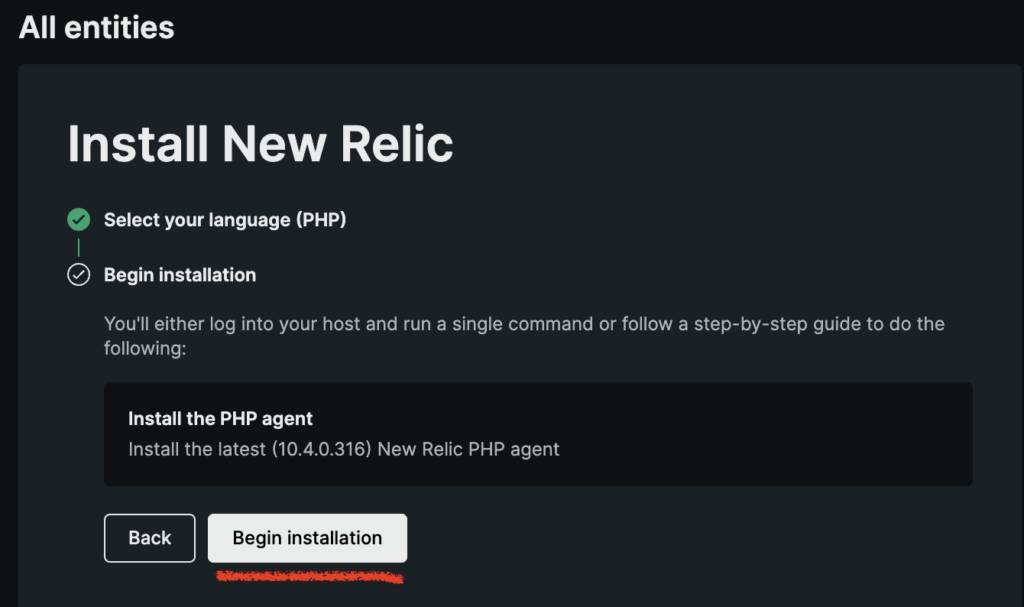

You can now leave this tab open because we will need it once we deploy the app and app starts sending data to New Relic. Finally, last missing piece we need is PHP agent version. Find latest version on the following link https://docs.newrelic.com/docs/release-notes/agent-release-notes/php-release-notes/. At the time of writing this post, latest agent version was 10.4.0.316. Take note of this value and try to keep the version constantly up to date.

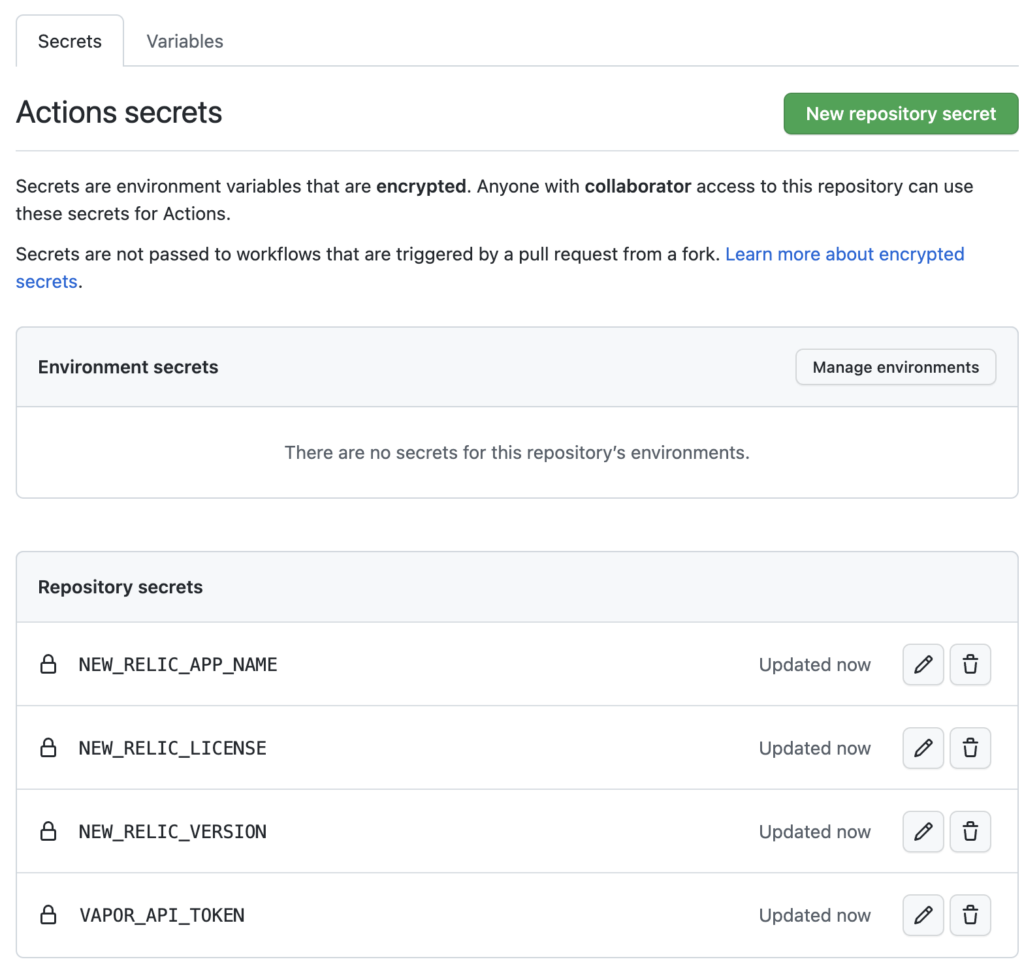
That’s it, now we have all we need:
- NEW_RELIC_LICENSE
- NEW_RELIC_APP_NAME
- NEW_RELIC_VERSION
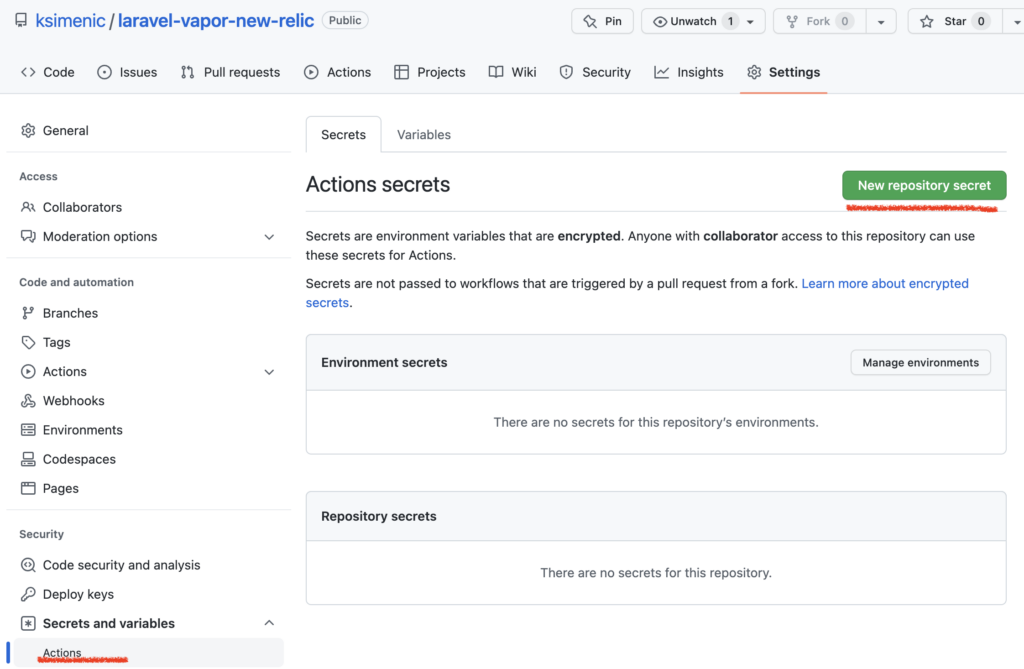
2. GitHub Actions
Let’s first create Repository secrets in GitHub for afore mentioned variables.
Next, we need to add workflow file. This is minimal .yml file we need to deploy Laravel app to Vapor. Last 3 lines will effectively pass set GitHub secrets to build process and you will be able to see the usage in next chapter where production.Dockerfile and vapor.yml will be presented and discussed.
name: Deploy

on:
  push:
    branches: [ master ]

env:
  VAPOR_API_TOKEN: ${{ secrets.VAPOR_API_TOKEN }}

jobs:
  deploy:
    runs-on: ubuntu-latest
    steps:
      - name: Checkout code
        uses: actions/checkout@v3
      - name: Setup PHP
        uses: shivammathur/setup-php@v2
        with:
          php-version: 8.2
          tools: composer:v2
          coverage: none
      - name: Install Composer dependencies
        run: composer install -q --no-ansi --no-interaction --no-scripts --no-progress --prefer-dist
      - name: Require Vapor CLI
        run: composer global require laravel/vapor-cli -q --no-ansi --no-interaction --no-scripts --no-progress --prefer-dist
      - name: Deploy Environment production
        run: >-
          vapor deploy production
          --without-waiting
          --commit="$GITHUB_SHA"
          --build-arg VERSION="php82"
          --build-arg NEW_RELIC_VERSION="${{ secrets.NEW_RELIC_VERSION }}"
          --build-arg NEW_RELIC_APP_NAME="${{ secrets.NEW_RELIC_APP_NAME }}"
          --build-arg NEW_RELIC_LICENSE="${{ secrets.NEW_RELIC_LICENSE }}"
3. Laravel Project and Laravel Vapor
Finally, we need to setup Laravel Vapor on our fresh Laravel app. You can find the repository with Laravel app and GitHub Actions workflow here: https://github.com/ksimenic/laravel-vapor-new-relic.
Firstly, we need to install vapor-core package.
composer require laravel/vapor-core --update-with-dependenciesNext, we need to run vapor init which creates 3 files:
- vapor.yml
- production.Dockerfile
- staging.Dockerfile
We will focus only on the first two. First let’s see vapor.yml contents.
id: 41009
name: laravel-vapor-new-relic
environments:
    production:
        runtime: docker
        memory: 512
        cli-memory: 512
        build:
            - 'COMPOSER_MIRROR_PATH_REPOS=1 composer install --no-dev'
            - 'php artisan event:cache'
Most important thing is to set runtime: docker. This effectively tells Vapor that, in the deploy process, it should look for production.Dockerfile and run it.
Finally, let’s take a look at production.Dockerfile.
ARG VERSION

FROM laravelphp/vapor:${VERSION}

ARG NEW_RELIC_VERSION
ARG NEW_RELIC_APP_NAME
ARG NEW_RELIC_LICENSE

# Download and install New Relic: https://download.newrelic.com/php_agent/release/
RUN \
    curl -L "https://download.newrelic.com/php_agent/archive/${NEW_RELIC_VERSION}/newrelic-php5-${NEW_RELIC_VERSION}-linux-musl.tar.gz" | tar -C /tmp -zx && \
    export NR_INSTALL_USE_CP_NOT_LN=1 && \
    export NR_INSTALL_SILENT=1 && \
    /tmp/newrelic-php5-*/newrelic-install install

# add global var to php.ini file
RUN echo "" >> /usr/local/etc/php/php.ini
RUN echo "extension = \"newrelic.so\"" >> /usr/local/etc/php/php.ini
RUN echo "newrelic.logfile = \"/dev/null\"" >> /usr/local/etc/php/php.ini
RUN echo "newrelic.loglevel = \"error\"" >> /usr/local/etc/php/php.ini
RUN echo "newrelic.appname = \"${NEW_RELIC_APP_NAME}\"" >> /usr/local/etc/php/php.ini
RUN echo "newrelic.license = \"${NEW_RELIC_LICENSE}\"" >> /usr/local/etc/php/php.ini

# Remove newrelic.ini file
RUN rm /usr/local/etc/php/conf.d/newrelic.ini

# Configure proxy daemon https://docs.newrelic.com/docs/apm/agents/php-agent/configuration/proxy-daemon-newreliccfg-settings/
RUN mkdir -p /usr/local/etc/newrelic && \
  echo "loglevel=error" > /usr/local/etc/newrelic/newrelic.cfg && \
  echo "logfile=/dev/null" >> /usr/local/etc/newrelic/newrelic.cfg

COPY . /var/task

USER root
RUN chmod +x /var/task/entrypoint.sh
ENTRYPOINT ["/var/task/entrypoint.sh"]
First we set PHP version from VERSION argument which we sent in Action workflow file as --build-arg VERSION="php82". Next, we need our 3 New Relic related arguments so we are adding them to the file with ARG. After that, we are downloading and installing New Relic with specific NEW_RELIC_VERSION which we added dynamically. Once installation is done, we need to configure New Relic in php.ini file. See how we are adding extension, setting logfile and loglevel as well as appname and license with the variables we set in GitHub Actions repository secrets and passed in workflow yml file.
Next, since we setup New Relic in php.ini, we don’t need need newrelic.ini anymore, so it is safe to delete that file. Finally, we are configuring proxy daemon. Per New Relic documentation
The daemon (
newrelic-daemon) acts as a proxy between the PHP agent and the New Relic collector to reduce network traffic and to improve response time for instrumented applications. The daemon process starts when your system starts, and must be running for data to be sent to New Relic.
Only thing that is left now is to start New Relic daemon and start PHP which will be carried out in entrypoint.sh file which is called at the end of our production.Dockerfile script. It is very simple and looks like this:
#! /bin/sh

# start New Relic daemon
newrelic-daemon -c /usr/local/etc/newrelic/newrelic.cfg

# start PHP
/opt/bootstrap

newrelic_background_job(false);
That’s it. Once you deploy the app and make few requests to it, you should go back to the tab you left open initially and, on the bottom, click on “See your data” button. Congratulations!
If you want to level up your apps and your codebase, check out other posts on our blog xdoo.hr.
Do you need help with setting up New Relic on Laravel Vapor?
For anything related to Laravel development send us your inquiry to [email protected]!
First of all, Thank you for your great tutorial
Did you manage to make it work with PHP 8.2?
I can only make it work with 8.1
Thank you Saraiva. I didn’t yet try on PHP 8.2. I will let you know once I try. Sorry for not being more helpful at the moment 🙁